
Remote Devices
WePROXA can act as a proxy for any device on your local network — physical iPhones, iPads, and Android phones, as well as other macOS, Windows, and Linux computers — so you can inspect real app traffic the same way you inspect browser traffic on your computer.
Prerequisites
Section titled “Prerequisites”- Your computer and the mobile device must be on the same Wi-Fi network.
- WePROXA’s proxy must be running.
- LAN access must be enabled (it’s disabled by default so the proxy only listens on
127.0.0.1).
1. Enable LAN Access
Section titled “1. Enable LAN Access”- If the proxy is running, stop it from the main toolbar. LAN access cannot be changed while the proxy is running.
- Click the Remote capture / LAN access device button in the main toolbar so it changes from local-only to network-accessible.
- Start the proxy again.
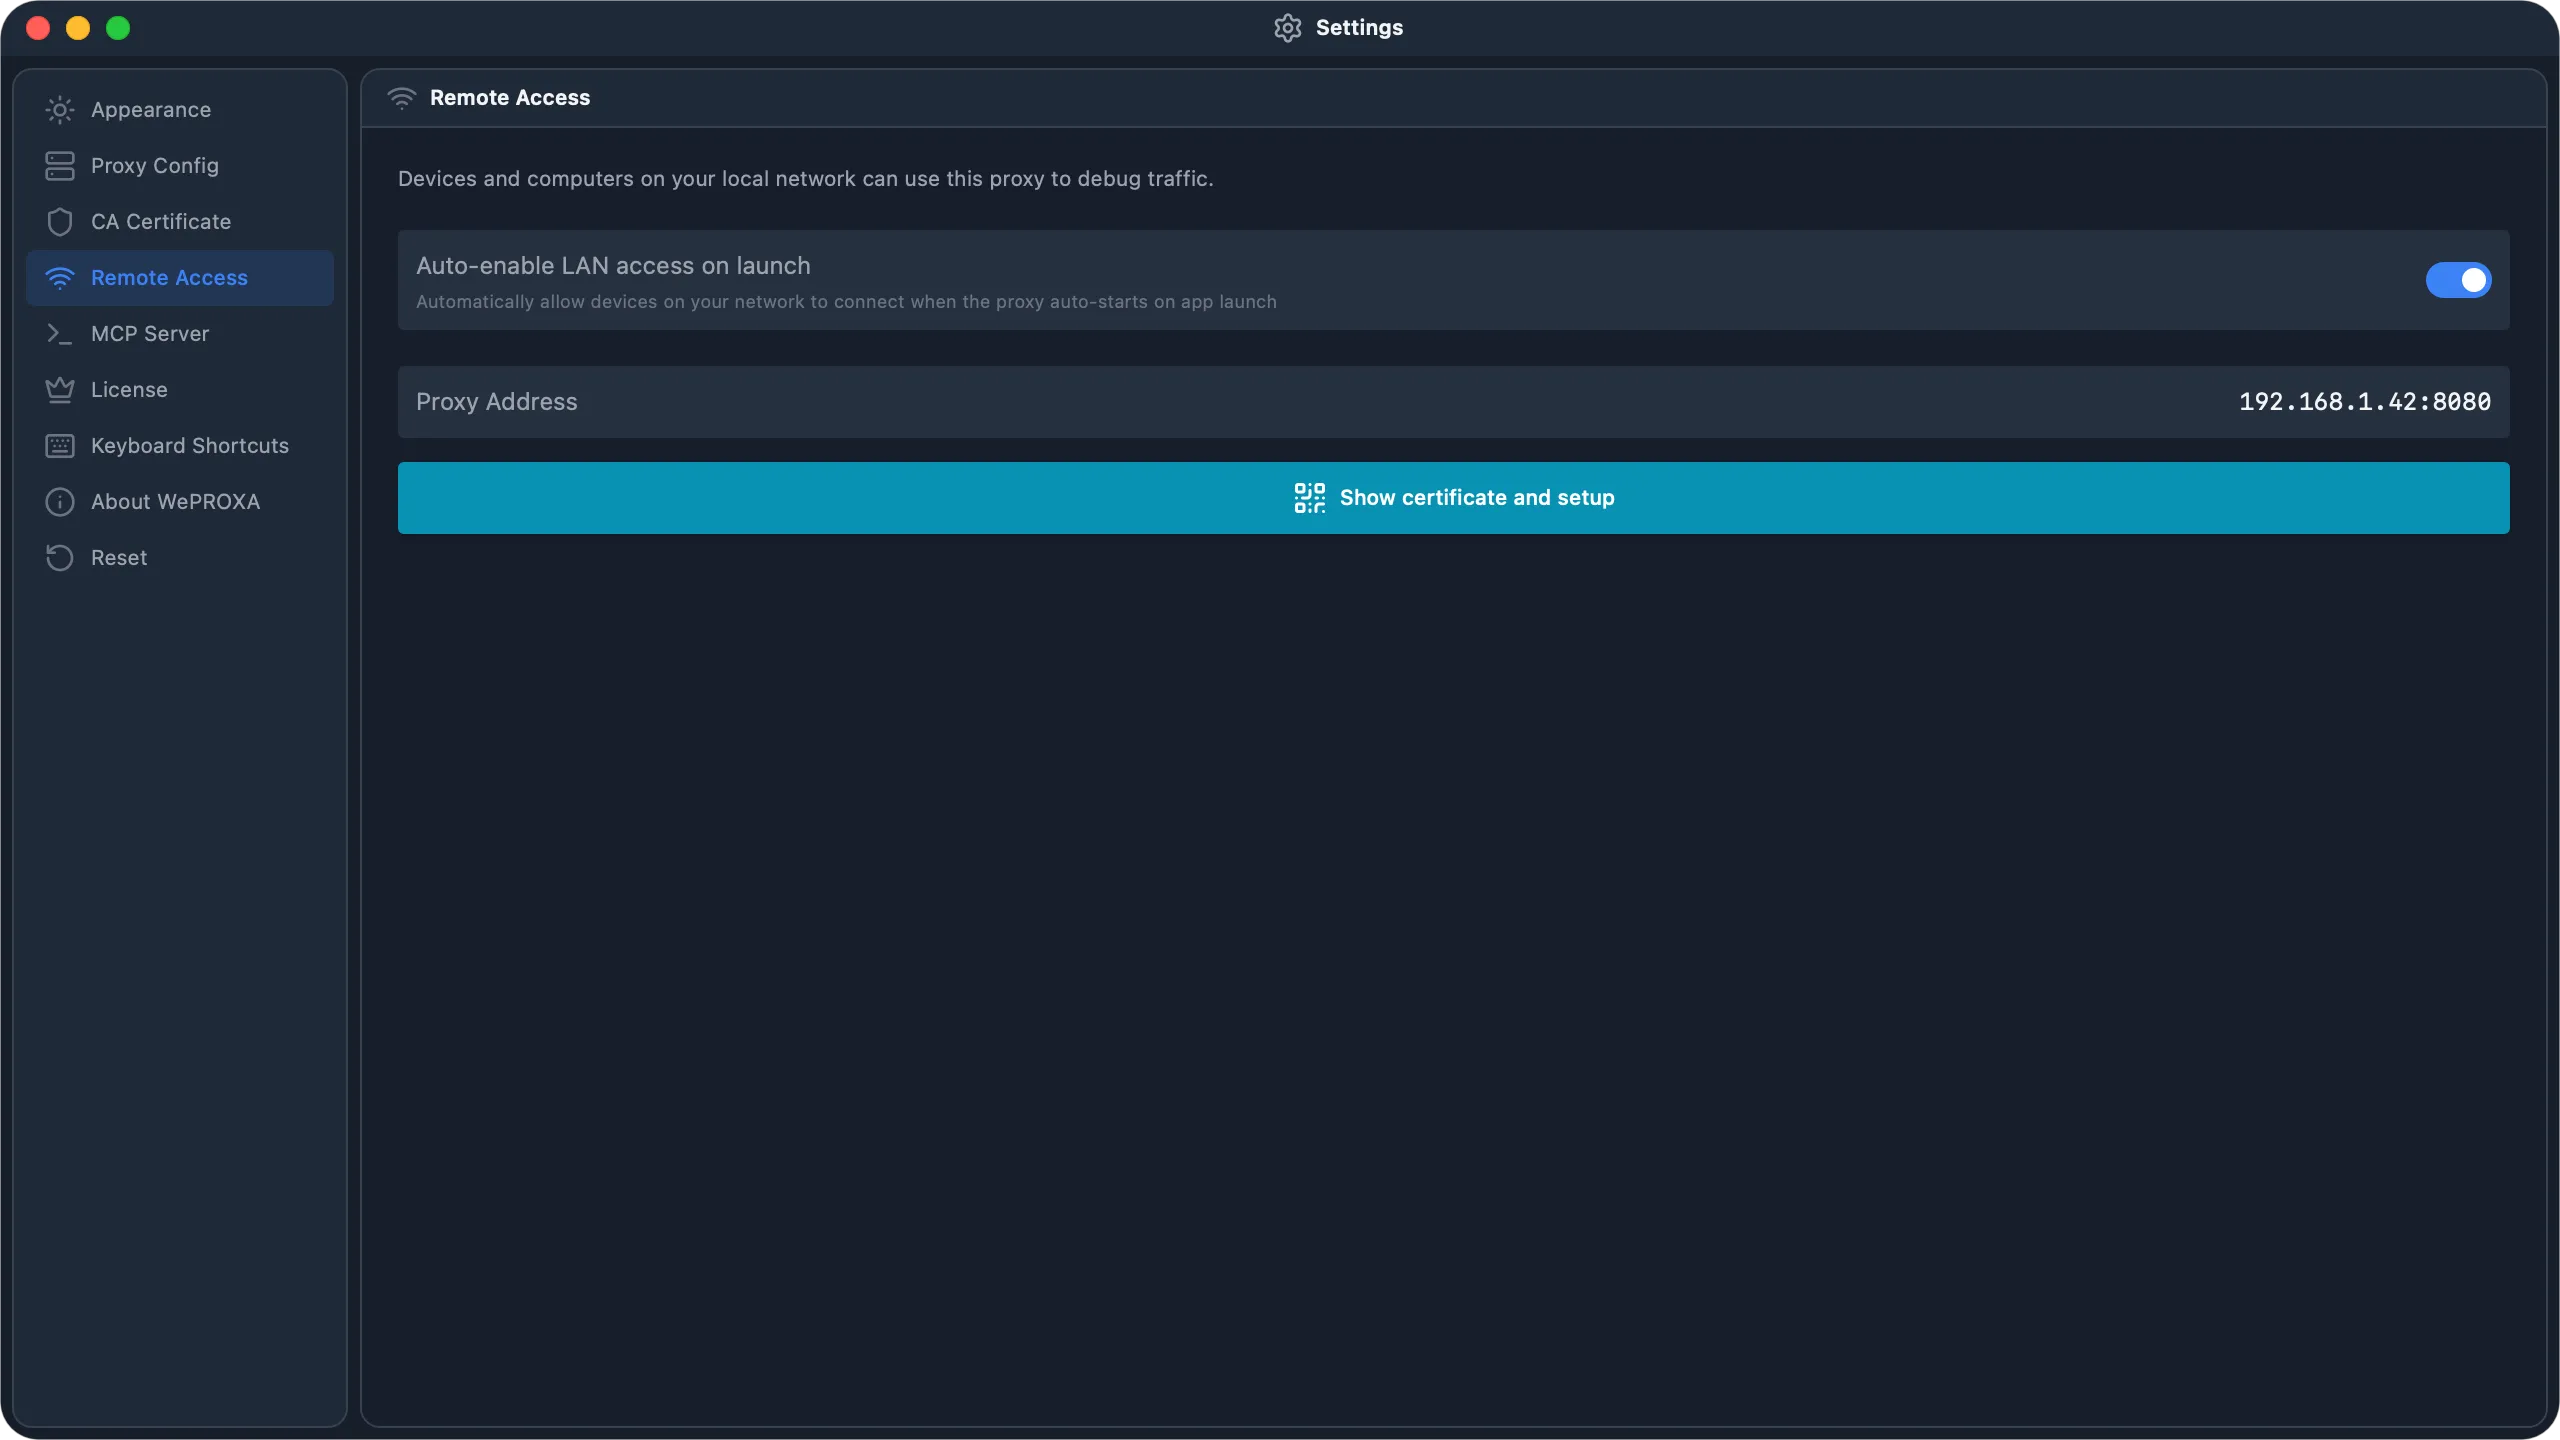
- Optionally open Settings → Remote Access and enable Auto-enable LAN access on launch. Pair it with Auto-start proxy on launch in Settings → Proxy Config when you want remote capture to start automatically.
When LAN access is on, the Remote Access panel shows your computer’s proxy address, for example 192.168.1.42:4545. Existing installations keep their saved port, so the panel may show a different custom value.
2. Install the CA Certificate on the Device
Section titled “2. Install the CA Certificate on the Device”To inspect HTTPS traffic from the device, the WePROXA root CA must be installed and trusted on that device.
WePROXA ships a temporary local certificate server on port 7676 with a QR code so you don’t have to email or AirDrop the certificate. If that port is busy, WePROXA automatically uses an available port and updates the displayed URL.
- In Settings → Remote Access, click Show certificate and setup.
- Click the QR thumbnail or Enlarge to open a larger code, then scan it on your device (camera app on iOS, a QR scanner on Android). You can also open the URL shown below the QR code in the device’s browser.
- Download and install the certificate, then trust it (see platform-specific steps below).
- Click Close in WePROXA when you’re done — this stops the temporary certificate server.
Dismiss the enlarged QR view with its × button, Escape, or a click outside it. The certificate server stays running while you return to the setup instructions. Use Close in the certificate setup panel when you want to stop the server.
- Open the URL in Safari (other browsers don’t install profiles correctly).
- Tap Allow when prompted to download the configuration profile.
- Open Settings → General → VPN & Device Management and install the WePROXA Root CA profile.
- Open Settings → General → About → Certificate Trust Settings and enable full trust for the WePROXA Root CA.
- Download the certificate from the URL shown in WePROXA.
- Open Settings → Security & privacy → More security settings → Encryption & credentials → Install a certificate → CA certificate. (Menus differ slightly by vendor.)
- Select the downloaded file and confirm. Android will warn about third-party CAs — this is expected for proxy debugging tools.
3. Choose a Proxy Setup Method
Section titled “3. Choose a Proxy Setup Method”After you open Show certificate and setup, WePROXA gives you two ways to point a device at the proxy:
- Manual proxy — enter your computer’s IP and proxy port yourself.
- Automatic proxy (PAC) — paste the PAC URL shown in the Remote Access panel.
Automatic Proxy Setup (PAC)
Section titled “Automatic Proxy Setup (PAC)”When the certificate panel is open and LAN access is enabled, WePROXA shows a Proxy Auto-Config (PAC) URL below the QR code.
Use this when you want the device to fetch proxy settings automatically instead of typing the host and port by hand.
- In Settings → Wi-Fi, tap the ⓘ next to the connected network.
- Scroll to HTTP Proxy and choose Automatic.
- Paste the PAC URL shown in WePROXA.
- Return to the app and keep the certificate panel available if you need to copy the PAC URL again later.
- Open the connected Wi-Fi network’s proxy settings.
- Choose Proxy Auto-Config if your device offers it.
- Paste the PAC URL shown in WePROXA.
- If your Android build does not support PAC, use the manual setup below instead.
Manual Proxy Setup
Section titled “Manual Proxy Setup”Configure the device’s Wi-Fi network to use the proxy address shown in WePROXA.
- Settings → Wi-Fi → tap the ⓘ next to the connected network.
- Scroll to HTTP Proxy and select Manual.
- Set Server to your computer’s local IP (e.g.
192.168.1.42) and Port to the WePROXA port (default4545). - Leave authentication off.
- Settings → Network & internet → Internet → tap the gear next to the connected network → Advanced.
- Change Proxy to Manual.
- Set Proxy hostname to your computer’s local IP and Proxy port to the WePROXA port (default
4545).
Open a browser on the device and visit any site — you should see traffic flowing into WePROXA’s request list.
Other Computers (macOS, Windows, Linux)
Section titled “Other Computers (macOS, Windows, Linux)”You can also route another computer’s traffic through WePROXA. Enable LAN access as described above and open Show certificate and setup on the WePROXA computer so the certificate URL and PAC URL are available, then follow the steps for the target computer’s operating system.
- Open the certificate URL shown in WePROXA in Safari or another browser on the Mac, and download the WePROXA CA certificate.
- Double-click the certificate to open it in Keychain Access (login keychain).
- Open the certificate, expand Trust, and set When using this certificate to Always Trust.
- Open System Settings → Wi-Fi → Details → Proxies.
- Enable Web Proxy (HTTP) and Secure Web Proxy (HTTPS), then set the server to the WePROXA computer’s local IP and the port to the WePROXA port (default
4545).
- Open the certificate URL shown in WePROXA in Edge, Chrome, or Firefox, and download the WePROXA CA certificate.
- Open the certificate file and choose Install Certificate.
- Choose Current User, then place the certificate in Trusted Root Certification Authorities.
- Open Settings → Network & internet → Proxy.
- Enable Manual proxy setup and set the address to the WePROXA computer’s local IP and the port to the WePROXA port (default
4545).
-
Open the certificate URL shown in WePROXA in a browser and download the certificate.
-
Install it into the system trust store — on Debian or Ubuntu, copy it to
/usr/local/share/ca-certificates/weproxa-ca.crtand runsudo update-ca-certificates. Apps that use their own certificate store (such as Firefox) need the CA imported there as well. -
Set the HTTP and HTTPS proxy to the WePROXA computer’s local IP and port in your desktop network settings, or export the environment variables for a terminal session:
Terminal window export http_proxy="http://<weproxa-ip>:4545"export https_proxy="http://<weproxa-ip>:4545"
The Automatic Proxy Setup (PAC) URL works from these computers too — point the OS or browser proxy configuration at the PAC URL instead of entering the host and port by hand.
Finding Remote Traffic
Section titled “Finding Remote Traffic”Requests from remote devices appear in the main request list and are also grouped under Devices in the sidebar source view, keyed by device IP. This makes it easy to isolate a single device’s traffic while other apps keep streaming.
The device row and each nested host row show live request counts from the current capture, so expanding a device gives you a quick view of where its traffic is going.
Troubleshooting
Section titled “Troubleshooting”- Nothing shows up — verify the computer’s IP is reachable (try
http://<computer-ip>:<port>in the device’s browser). A firewall may be blocking incoming connections. - HTTPS errors on the device — the CA profile isn’t installed or isn’t fully trusted. On iOS, check Certificate Trust Settings.
- App traffic not captured (Android) — the app may ignore user CAs, use its own trust store, or pin certificates. For an app you control, use a debug build and follow Android Emulator. Installing the CA alone does not make every Android app trust it.
- Certificate QR code won’t load — the local cert server uses a short-lived port. Close the setup panel and click Show certificate and setup again to restart it.
- Certificate QR code port is already in use — reopen Show certificate and setup. WePROXA automatically falls back to an available port when the default certificate server port is busy.
- PAC URL missing — PAC is only shown while the certificate panel is open and LAN access is enabled.
- Automatic proxy stops working later — reopen Show certificate and setup to bring the PAC URL back if the temporary cert server was closed.